
On December 18, 2018 Skylum will be releasing their long awaited DAM (Digital Asset Manager) for Luminar. Called Luminar 3 with Libraries, this will be a free update for everyone who currently owns Luminar 2018 on Mac and Windows.
Originally, it was first talked about being released in 2017. Once that didn’t happen it was next anticipated to be released in early 2018. That didn’t happen either, but now here it finally arrives a couple weeks shy of the end of 2018.
Has the long wait been worth it? Let us find out.

Quick Note Before We Get Started
I will be doing a number of free webinars showing off the new Luminar 3 with Libraries between now and December 22. I will update this blog post here once I confirm the dates and I will also be posting it on my Facebook Page as well as in my free-to-join Luminar/Aurora Facebook Group. These will be my own webinars, put on by yours truly 🙂
Join me in one of these webinars to see what is new and to ask any questions you have!!
Two New Webinars have been added, for Saturday, December 15, and Monday, December 17, 2018.
The Good
Since it’s arrival in 2017 Luminar quickly started replacing ON1 as my #1 goto program for enhancing my photographs. At the time, I was still using Capture One Pro and, to a much lesser extent, Lightroom for my RAW files. After some initial adjustments to my RAW file I would send a 16-bit Tiff file to Luminar to finish it off and give it my signature look.
In the middle of 2018 I came across an awesome catalog program called Mylio, which I moved all of my images into to keep things organized. Capture One Pro had just become too slow to deal with as my catalog got larger. So, I found myself using Mylio to send my RAW files direct to Luminar 2018, and since then it has been doing a fabulous job for most of my RAW files.
But wouldn’t it be great, seeing that I was spending so much time now in Luminar, to have Luminar keep track of all my photos?
Enter Luminar 3 with Libraries.
- Luminar 3 can now keep your photos organized with its new Library addition. You can create multiple catalogs to organize just the photos you want to keep organized by adding folders from your computer, external hard drives, and even cloud storage. You can even import files from a card reader and have Luminar 3 handle the organization. It’s important to note that Luminar 3 exactly mirrors your hard drive. If you move files outside of Luminar with your Finder or Windows Explorer, Luminar will know about it and adjust its catalog accordingly. Same as if you rename files or folders. This is unlike Lightroom, where if you move a file in Finder/Explorer, Lightroom will have no idea where it went. You can also use Luminar 3 to move/rename/delete files. Your files will be moved/renamed/deleted in Finder/Explorer as well.

- Adding photos to your Catalog is extremely fast. Using my 2018 MacBook Pro with Mojave, a 2.6GHz i7 processor with 32GB of RAM with my RAW files on a LaCie RAID external hard drive with a Thunderbolt connection, I added 65,500 RAW files to my catalog. In just 4 minutes and 34 seconds I was able to start browsing and rating my images!
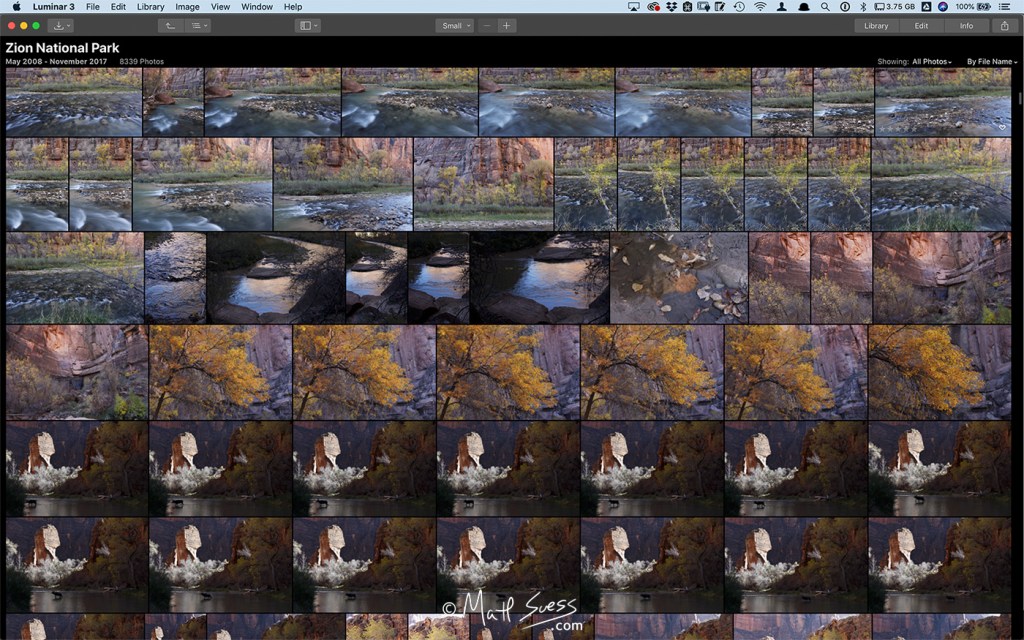
- Browsing your photos in thumbnail view is extremely fast as well. Low-res thumbnail previews are viewable right away as you scroll through a folder and almost instantly a sharper thumbnail preview is generated.
- After adding your photos to your Catalog, Luminar 3 has some great shortcuts to find them. You can instantly find photos organized by year, month, and day and at a glance see how many photos are in each category. There is a shortcut to Recently Added photos as well as Recently Edited. There is a shortcut to Quick Edits too. Quick Edits are photos you open directly into Luminar that for whatever reason you don’t want to have added to your Library for Luminar to keep track of.

- You can give photos a star rating from 1-5, give them a Picked or Rejected tag, and give them a color label of either None, Red, Yellow, Green, Blue, or Purple. You can use all of these tags to sort your images in the Library for quick access. You can also sort your images by Capture Time, Edit Time, File Name, Type & Size.
- You can also create Albums. These are virtual Albums that don’t take up any extra space on your hard drive and are used to better organize your photos. You can add and remove photos at will in and out of the Albums you create and your original files will be safe in their original locations.
- A really cool feature – my favorite – is that you can Sync Adjustments from within your Library. Simply select one photo and Edit it, then select other photos you want to sync the adjustments to and all of your adjustments will be applied to the other photos. This could be a huge time saver! Originally if I wanted to do this, I would have had to create a Preset (Now called Looks in Luminar 3) and apply that preset to the other files I wanted to adjust via Batch Processing.
- And speaking of editing your photos, everything is done non-destructively and every edit you do is stored in the catalog. No save button to select.
- Another great feature is the ability to have multiple catalogs and an easy way to back them up too.
- As of this current release, Luminar does not yet save files in the proprietary .lmnr file format. I have however been able to successfully open them up from Luminar 2018 inside Luminar 3.
- Windows users will be happy to hear of some new improvements. I haven’t had a chance to verify it on my Windows laptop just yet, but Skylum mentions the following improvements:
- Color Management Improvements – Issue Fixed. You’ll be able to properly manage colors between Luminar, monitor and 3rd part devices.
- Various Improvements – Speed improvements, Image Export improvements, more controls for filters, plug-in performance improvements, share pop-over updated, drag & drop issue fixed and other.
The Bad
Disclaimer – I am writing this review using a pre-release version of Luminar 3 given to me 2 weeks prior to the public availability. It is possible that some issues I mention here do not make it into the final version.
Adding a DAM database to a program is one heck of a challenge, I am sure. With this being the first release, it is probably expected that some things are not ideal and need to be worked on. Here are some of those issues I am finding.
- If you have multiple exposures and want to send those photos to Aurora HDR 2019, there is only one way to do that. Select them in your Library and drag them onto your Aurora HDR 2019 icon in the dock. It will send all of the images over in their original format (including RAW). If instead you choose the Open In shortcut icon in the upper right-hand corner of the program, Aurora HDR 2018 opens up and only one photo at a time is sent over and it isn’t the RAW file. So you can’t merge files that way. Same thing if you choose File/Open In. If you choose Edit/Plugins/Aurora it will send it to Aurora HDR 2019 but again it only sends photos over one at a time and it isn’t the RAW file. And until Skylum updates Aurora HDR 2019, you can’t send files direct from there to Luminar 3 – they go to Luminar 2018 instead.
- Another thing that annoys me greatly is whenever you bring a RAW file over to Edit, the Lens Distortion is automatically applied and there is no way to disable this from happening. You have to manually turn it off each time if you don’t want it applied. This annoys me because for most of my shots I am cropping in-camera. I shoot a lot of landscapes with a wide-angle lens and for the most part you can rarely tell if there is any distortion. It’s not as if I am photographing a brick wall and can thus easily see the distortion in the lines of bricks. So Lens Distortion ends up cropping into my photo slightly – a problem when you are cropping tightly in-camera. When ON1 first came out with ON1 RAW they too started doing auto Lens Distortion and I noticed it when using a beta and suggested they give us an option to turn it off in preferences. They ended up adding that preference once the software shipped. I suggested the same here with Luminar, but so far it remains… Please give us the choice Skylum.
- Another minor annoyance is that you can only size your thumbnails in Small, Medium, Large, and Largest sizes. Most catalog programs give you a slider with a much larger size range to work with for thumbnails.
- When you are working in Edit mode, you can opt to have a handy filmstrip of your images along the left side. Unfortunately, this filmstrip is too narrow and the size is not adjustable.

- As cool as it is to select multiple files in the Library to sync adjustments, you would think that the same would work for Batch Processing. It doesn’t however. Selecting multiple images and bringing up Batch Processing does not load them into it – you need to drag & drop or navigate your hard drive to find them.
- While Luminar 2018 can process RAW files from my very old (early 2000’s) Canon 1Ds, Luminar 3 can not. This is the first program I have found that can’t do this.
- And lastly there is no way to view filenames along with each of the thumbnails when in grid mode.
…And The Ugly
Ok, so I did already mention that building a database must be extremely difficult. And I did mention that I love using Luminar to edit my photos!
But…
There are some things in this very first release that I am not at all crazy about and, as an educator, it is my responsibility to keep it real and let you know about them.
- Even with one of the currently fastest MacBook Pro’s available thumbnail generation is painfully slow especially with RAW files from a Sony a7R3. I am talking about 10 seconds slow!! When you double-click on a thumbnail image in your Library to view it super large, it takes on average 10 seconds for Luminar to finish its preview. After an initial launch of it, Luminar makes 3 more passes at improving the image – each of which are visibly noticeable. Even the histogram slightly shifts between each pass. This is just way too much time for each photo. UPDATED 12/18/2018: With the official release, large previews now appear in about 4 seconds, although I have encountered it taking up to 10 seconds when going back to previously built thumnails on occasion.
- After the super large preview is built and you move on to the next photo, if you use the arrow keys to go back to previously built previews you can notice a little size/flicker adjustment of the image. Kinda hard to explain without a video of it – let’s just say it is not 100% smooth moving between cached files.
- The caching of these files needs some serious enhancements! Luminar stores these preview caches on a Mac in the following folder: User/Library/Application Support/com.macphun.luminar3. And with each file you look at in the super large view, a cached version is created in that folder that is roughly some 15-20% bigger than your original file! So I have a 43MB RAW file and when I preview it in the Library, I lose 51.7MB of hard drive space on my computer! You can adjust the cache size in Luminar’s preferences fortunately. It does default to 10GB. And with 10GB, that means I can only store 196 files from my Sony camera in the cache at the default. When you reach your set cache limit, the oldest previews generated in cache are eliminated to keep the cache size at the set size. 196 photos isn’t even close to a day’s shoot so most people are going to have to increase that cache size in the preferences. There is also no way to change this default cache location to another location, say an external hard drive. Laptop users with limited hard drive space are going to be challenged. UPDATED 12/18/2018: With the official release the cache is vastly improved with each preview now taking less than 1MB
- The default location of your catalog is in your Pictures folder. A good thing about the catalog files is that they can be stored on an external hard drive. Another good thing about it is its initial size. After adding 65,500 photos my catalog size was only 19.4MB to start out with (remember that thumbnails/previews are stored elsewhere). The catalog stores all of your ratings and edits and I have noticed an issue here. There is a History folder that is made up of .state files. Each and every time you make a slider adjustment, a new .state file is created. Each averages about 200kb in size. That’s not a huge file for sure, but again – each and every time you make a slider adjustment a new file is created. Some files you work on might have dozens if not hundreds of slider adjustments made to it. What’s more, if you go back to the original version of your file via the history and start fresh, those old history states disappear from your photo but those original history .state files end up remaining and don’t get deleted. These history states are what provides Luminar with the ability for non-destructive adjustments. But I can definitely see this starting to take up some significant hard drive space to save all of this. Again it is good we can move this to an external drive with more space. UPDATE 12/18/2018: With the official release, if you return to your original history state and make a new slider change, then quit out of the program, the old history states are now removed on the Mac.
- No keywords, no captions, no .xmp file support, no IPTC, no geo-tags, no versions or stacks, no smart albums, etc. This isn’t fun. When you import your files, the only info that gets brought in is camera metadata. If you have keywords or star ratings or anything else either embedded in your file or stored in an .xmp sidecar file Luminar 3 won’t see it. This means you are starting all over with your catalog organization and it could be a deal-breaker for a bunch of photographers. In addition, if you export a file to Photoshop, your star rating doesn’t get sent with the file. A lot of this is basic photo catalog management and it is quite disappointing to not see any of this yet in this first release.
Look Into the Future

Skylum fully admits that this first release is only just the start. They know a lot of features are missing right now. And, they have even been public about what their roadmap for the near future is.
In fact here are their plans for Luminar 3 with updates coming January through July, 2019:
- Raw + JPG (Luminar Libraries) – You’ll be able to work with Raw & JPG versions of the same image in a more convenient way. View as a single image, but switch between versions in real time.
- Virtual Copies (Luminar Libraries) – You’ll be able to create versions of a photo with different styles, adjustments, editing history, etc. This is especially useful when you want to try different looks on the same image.
- IPTC edit & sync (Luminar Libraries) – You’ll be able to edit core IPTC info. Plus create custom presets related to IPTC data and sync these presets across multiple images.
- Hidden Features (Powered by AI) – We are busy working on more smart tools powered by Artificial Intelligence to give you more powers when editing skin on portraits, architecture; removing objects or simply applying masks on your images.
- Lightroom Migration Tool – You will be able to move your data and images from Adobe Lightroom to Skylum Luminar.
- Smart Search (Luminar Libraries) – You’ll be able to quickly find the image you need, using keywords, EXIF information and file names.

Conclusion
So after all of this what is my opinion? What is my advice for you?
My initial reaction when I first started testing Luminar 3 the other month – as far as the new Libraries are concerned – is that it really isn’t much more impressive than a slightly enhanced image browser. I definitely couldn’t take it as a serious DAM.
And unfortunately my opinion remains.
There are some really good things to like here such as adjustment syncing and super fast importing, but there are some very important features currently missing that are required basics in today’s image cataloging programs.
For photographers who never organized their photos before, who don’t have a lot of photos, or whose organizational needs are very basic I think people are going to be very excited right now with the new Libraries in Luminar 3.
For photographers who have catalogs already in Lightroom or Capture One or Mylio or elsewhere, well, I am not quite sure the version of Luminar 3 shipping on December 18, 2018 is going to get you super excited and allow you to easily move away from those programs. Especially if you rely on keywords and captions.
However, the fact remains that Luminar 3 is still an amazing tool for image editing.
While you may not yet be able to do a Library search for all of your bear photos with a simple keyword search, you still can navigate via a folder structure to find them, add new star ratings to them, and easily edit them in Luminar.
With the 51 filters currently inside of Luminar, there are some that just don’t exist anywhere else and ones I can’t live without. You won’t see me moving away from Luminar anytime soon! But you also won’t see me moving away from Mylio for my own image organization any time soon either.
But once you do have some photos organized it is pretty darn simple moving back and forth between the Library and the Edit mode. Despite some slowdowns here and there, I have a feeling that this is going to speed up many a workflow. It is not anywhere near where I want it right now, but I will definitely be along for the ride waiting on the improvements!
Looking into the future, I see some light.
Lastly, let’s consider the price. This is a free upgrade for Luminar 2018 users. And the regular price of Luminar 3 with Libraries is just $69! Considering the price along with the features that are coming down the road, I just can’t see anyone not owning and using Luminar. The editing capabilities alone are worth at least triple the price they are selling it for.
If you do not yet have Luminar, now is the time to pre-order Luminar 3. Here are all the pricing details now through December 18 at midnight:
- New users can purchase Luminar 2018 for US$59 – or only US$49 with my coupon code: mattsuess
- Current Luminar 2018 users get it for free on December 18
- Current users of Luminar 2017 can upgrade for US$49 – or only US$39 with my coupon code: mattsuess
- Owners of the Creative Kit can purchase Luminar for US$49 – or only US$39 with my coupon code: mattsuess
- Current users of Aurora HDR (2016 – 2019) can purchase Luminar for US$49 – or only US$39 with my coupon code: mattsuess
- Current users of Photolemur can purchase Luminar for US$49 – or only US$39 with my coupon code: mattsuess
There are also some pretty cool special offer bonuses Skylum is including and you can read up on them here.
Speed up Your Learning of Luminar 3
Keeping up with learning how to use software can be challenging and frustrating.
Sure, there are lots of free articles and free videos all over the internet. But searching for them and listening through all the fluff in many of these videos to get to the important stuff can be a waste of time – except from my friend Jim – he’s got some good stuff out there 😉
I can relate – I just watched a 25 minute YouTube video on something and had to watch it at 2X speed to not waste too much time for that 1 minute of valuable info I got out of it.
So if you are serious about learning Luminar 3 with Libraries, then you have to consider my new Mastering Luminar 3 Online Course!!
This is my 3rd online course on Luminar. There are a ton of videos, easily organized, and ready for you to learn material without all the fluff.
Plus, there is a private course Facebook community included with enrollment where you can share photos & ideas, post questions, and learn from fellow course students.
There are going to be a lot of workarounds needed with the new Libraries, and with more features coming soon you are going to want the best info available from someone who tells it straight-up like it is.

Disclosure about product links and affiliations: Some of the links I provide are affiliate links which means I get a small commission, with no additional cost to you, if you click it and end up buying something. It helps me provide free educational resources and articles. So if you use them, thank you! My affiliations however never influence my opinions on any products/services and I am only affiliated with companies whose products/services I personally use.